mei 172015
 

MotorOrigineel

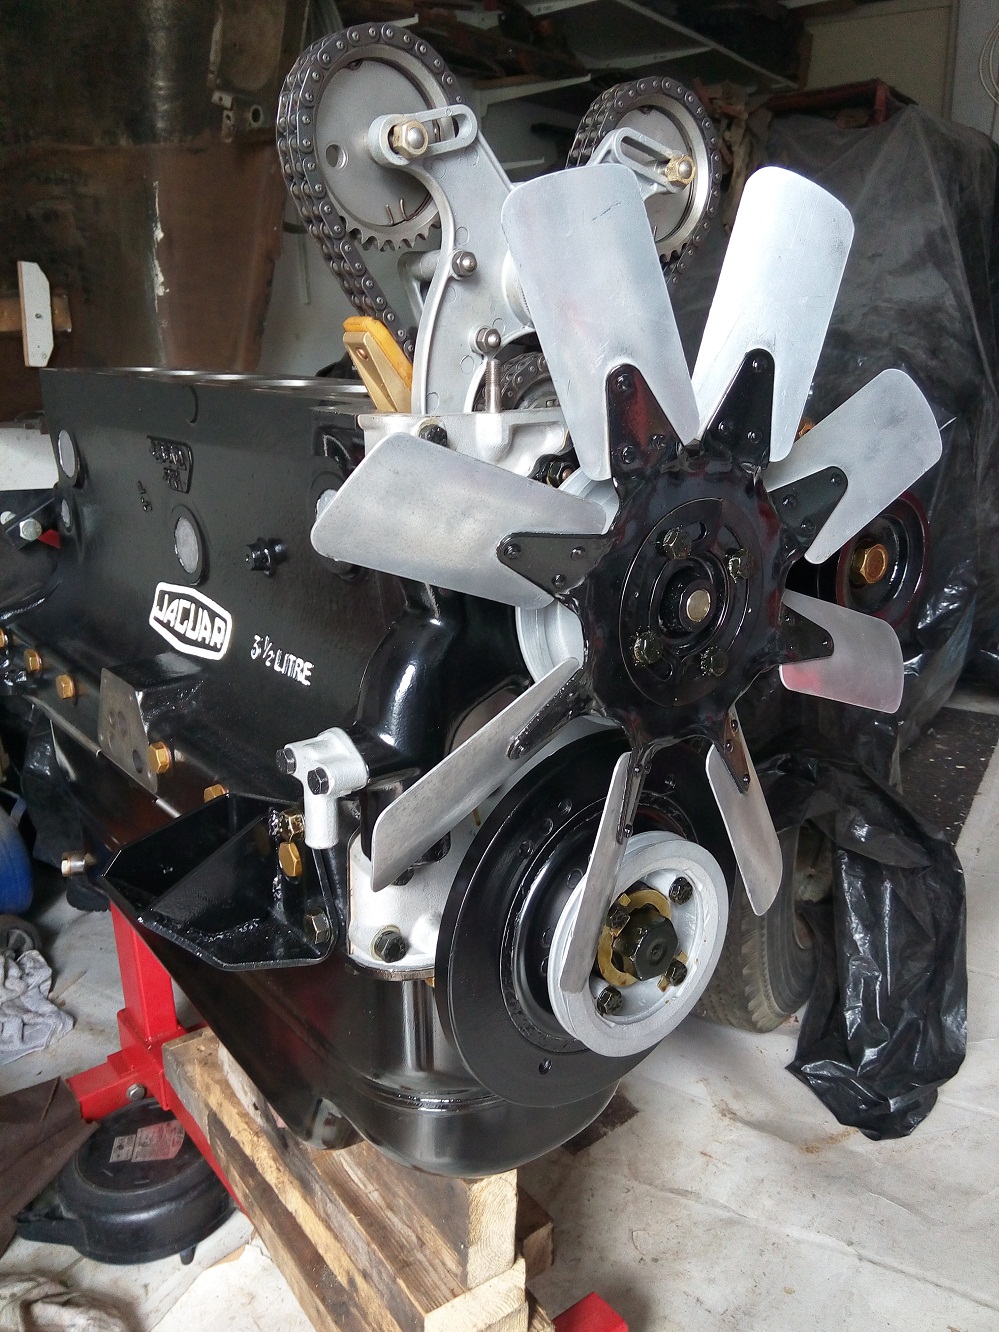
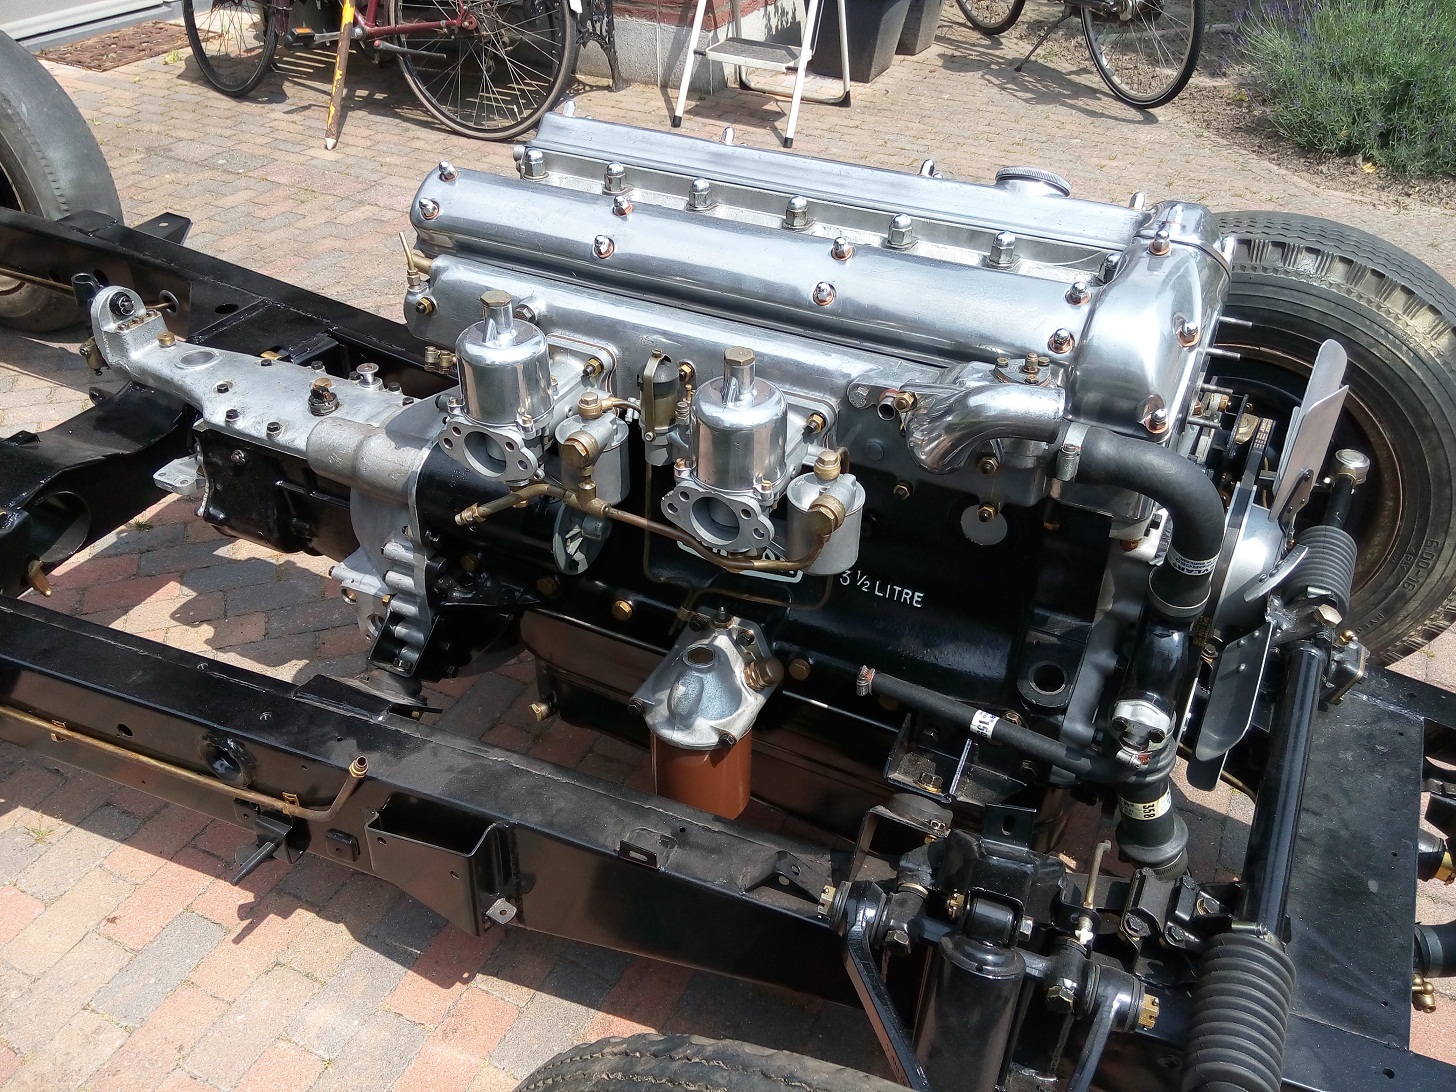
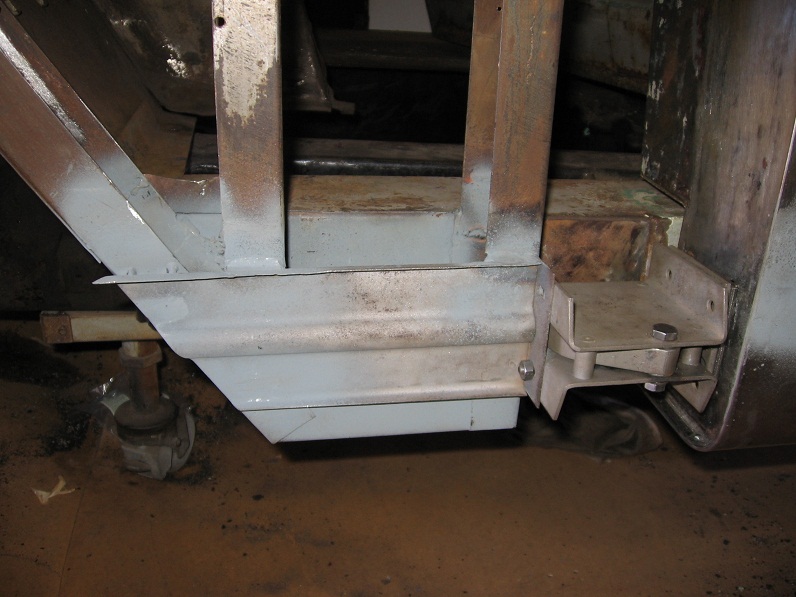
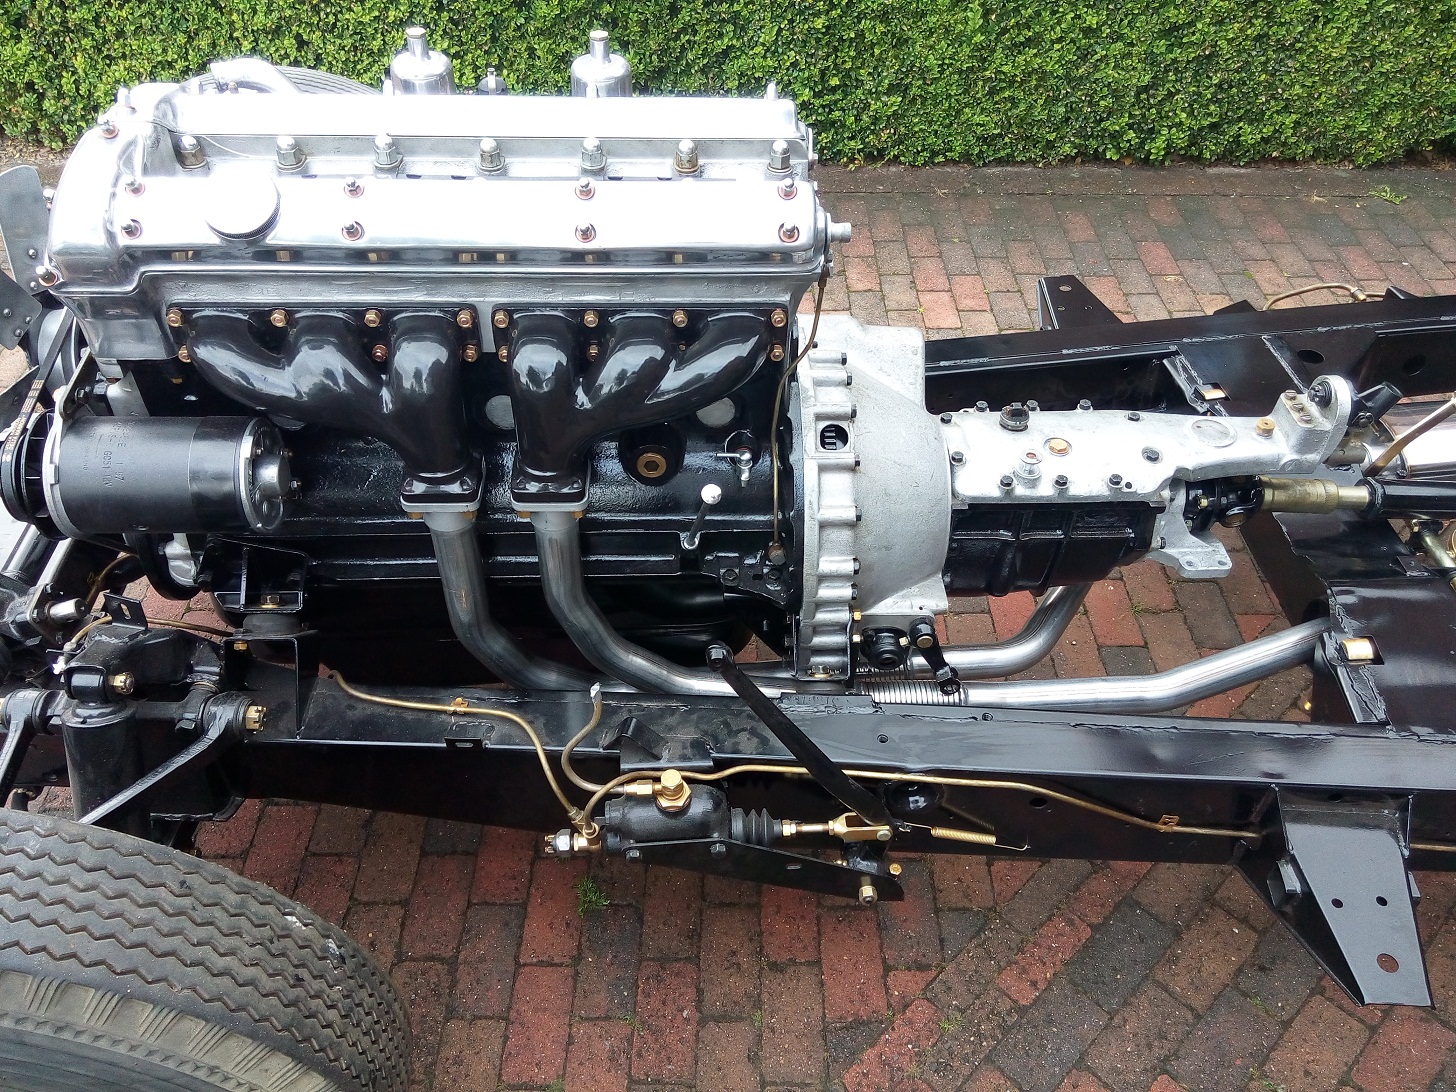
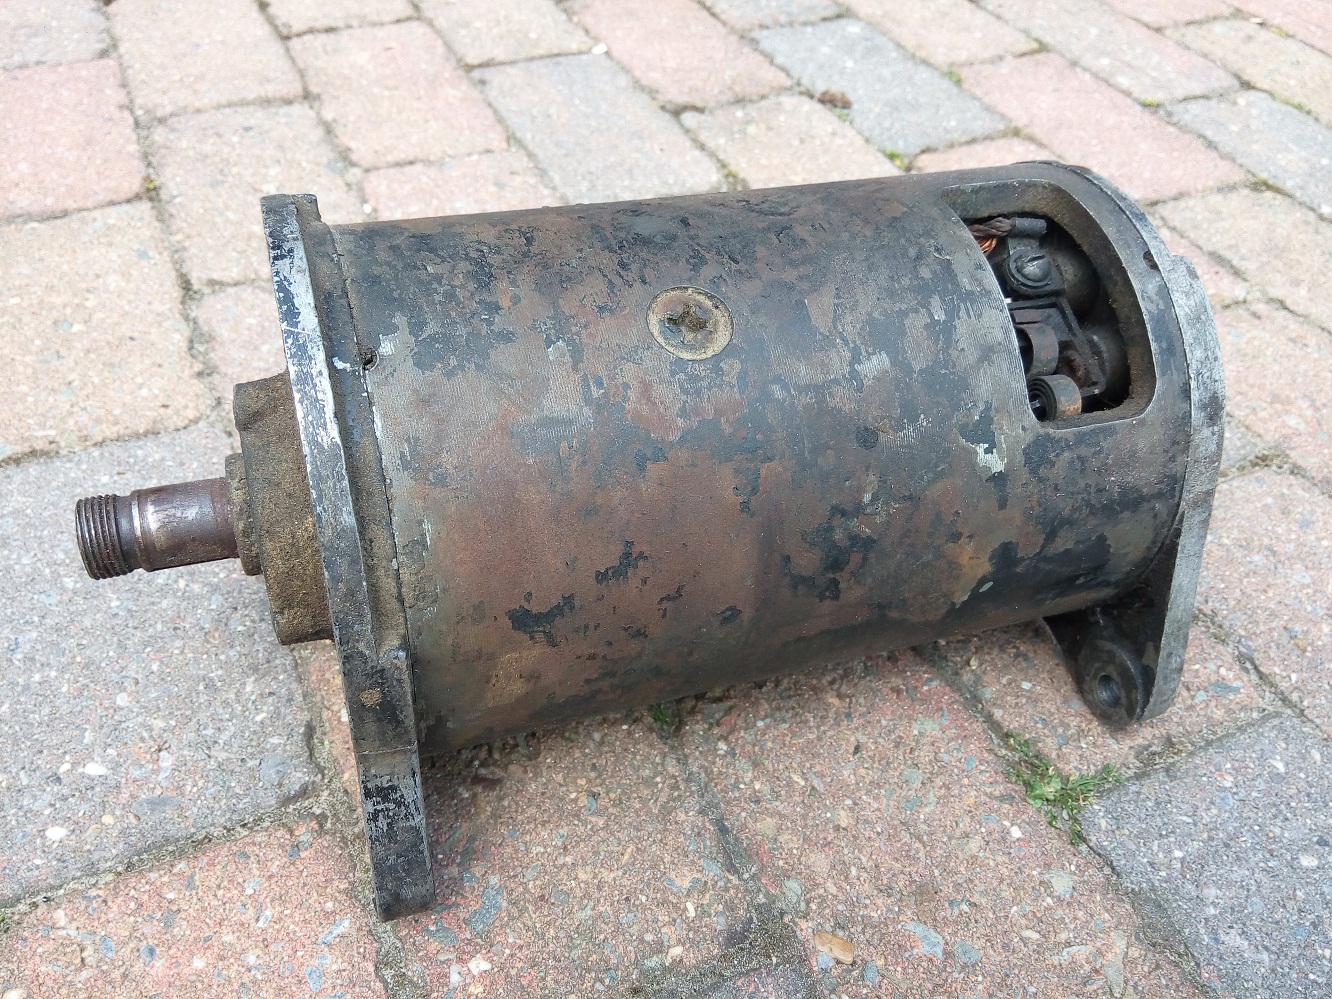
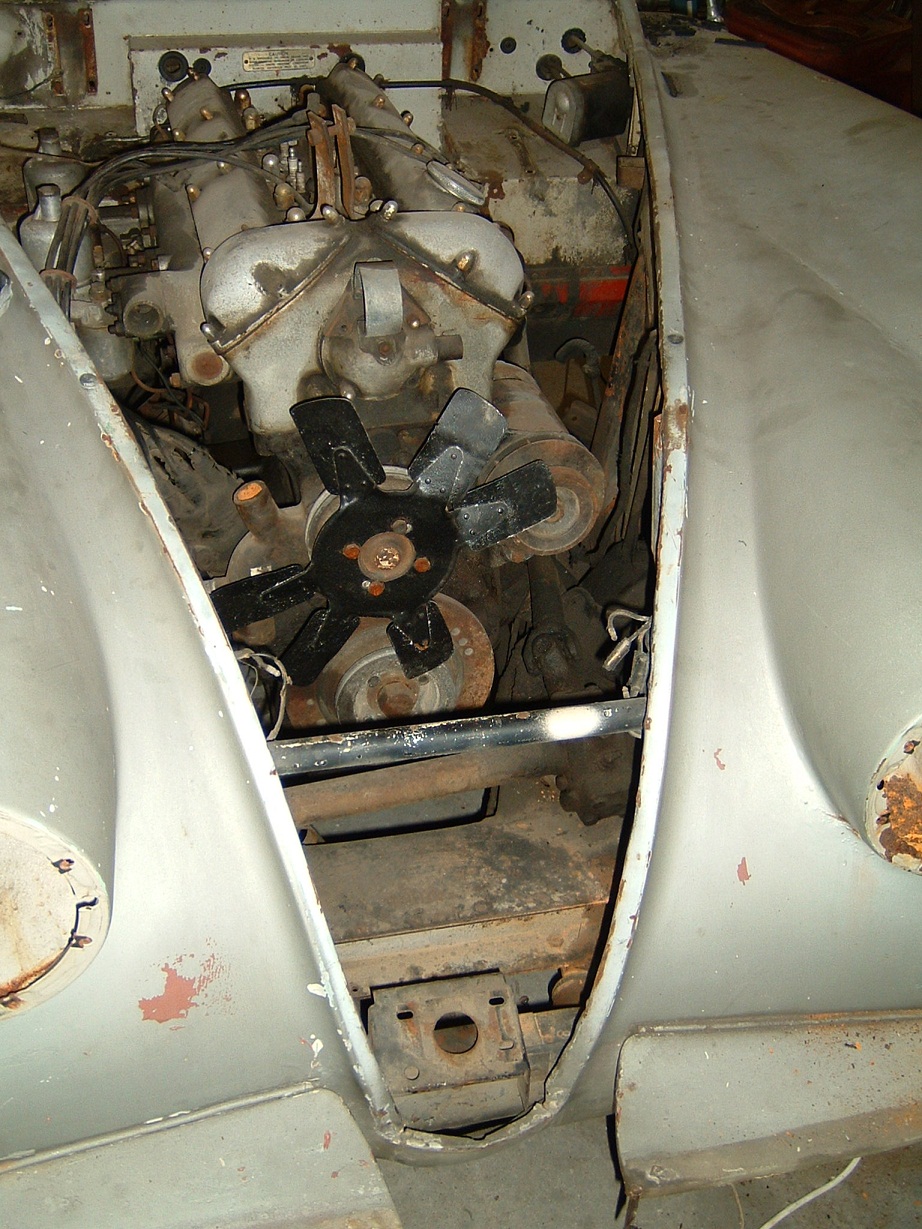
Front side of the engine with wrong fan blade

Originally the engine inside my car was equipped with the wrong type of fan blade. Instead of the xk140 type blade (symetric) it was equipped with the xk120 fan blade (a-symatric)

CoolingFanParts

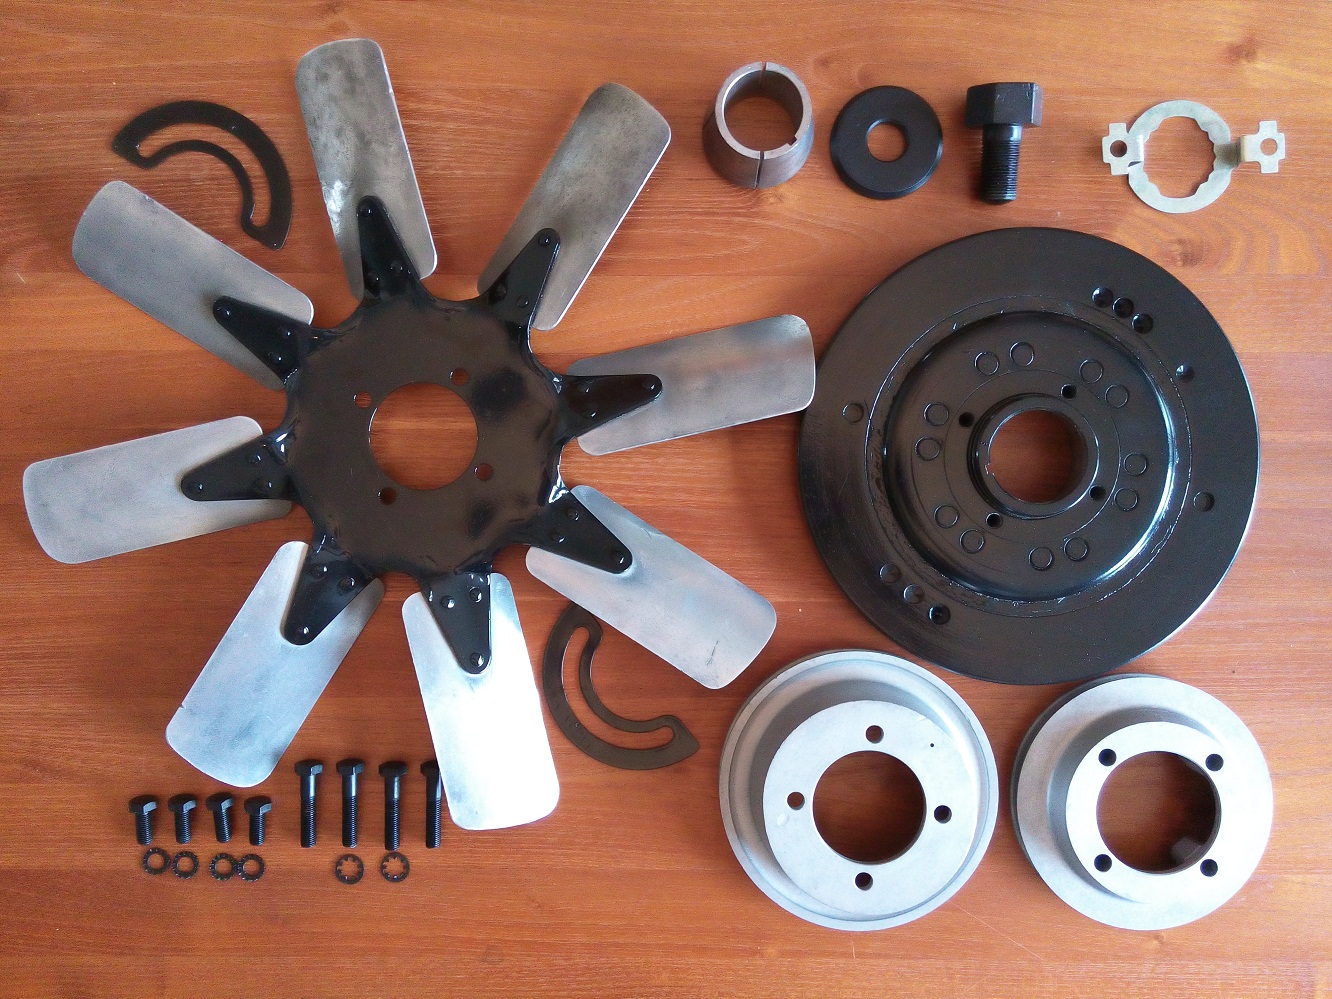
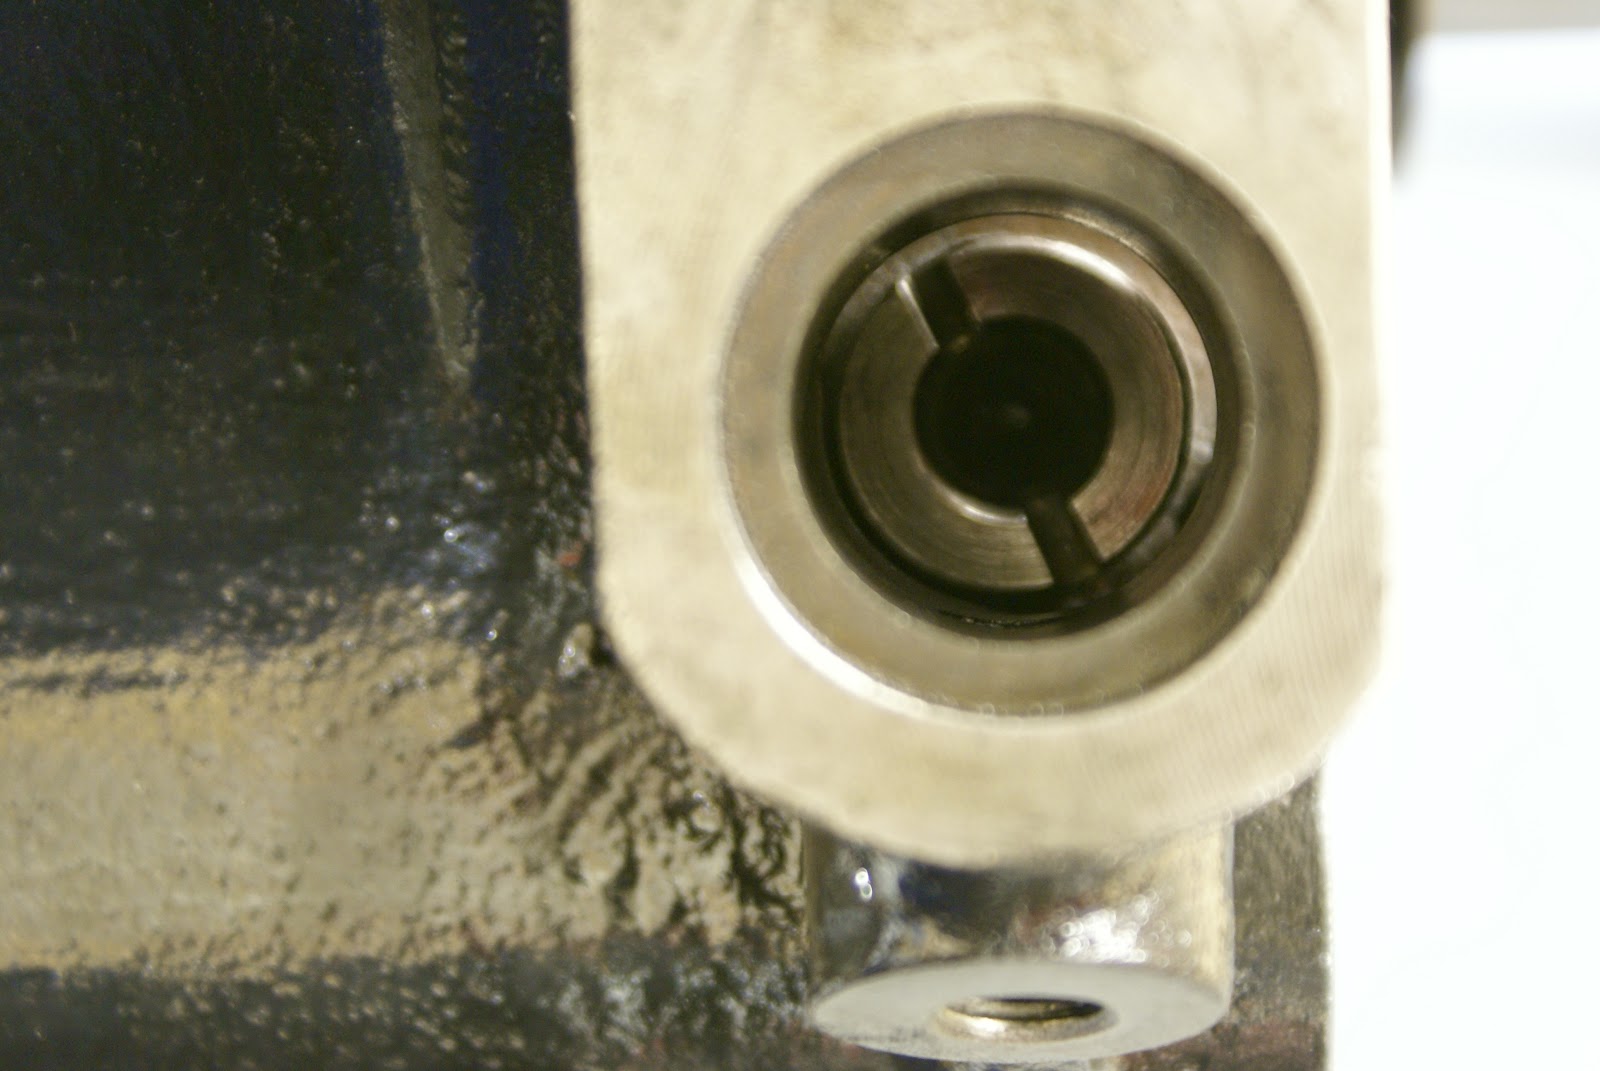
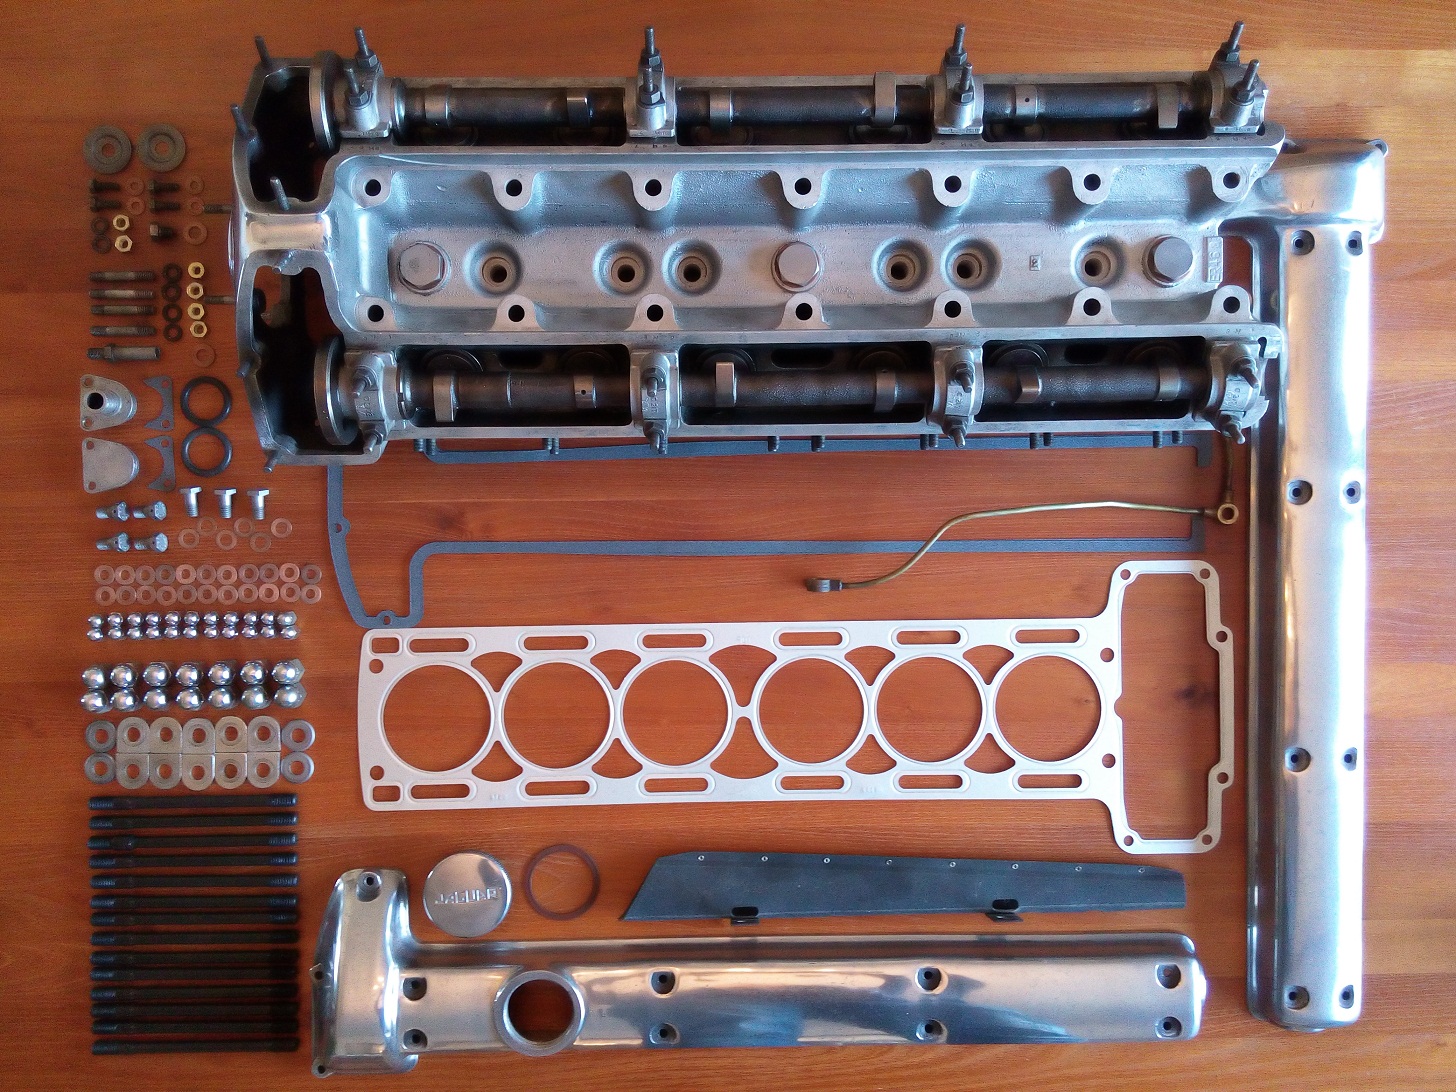
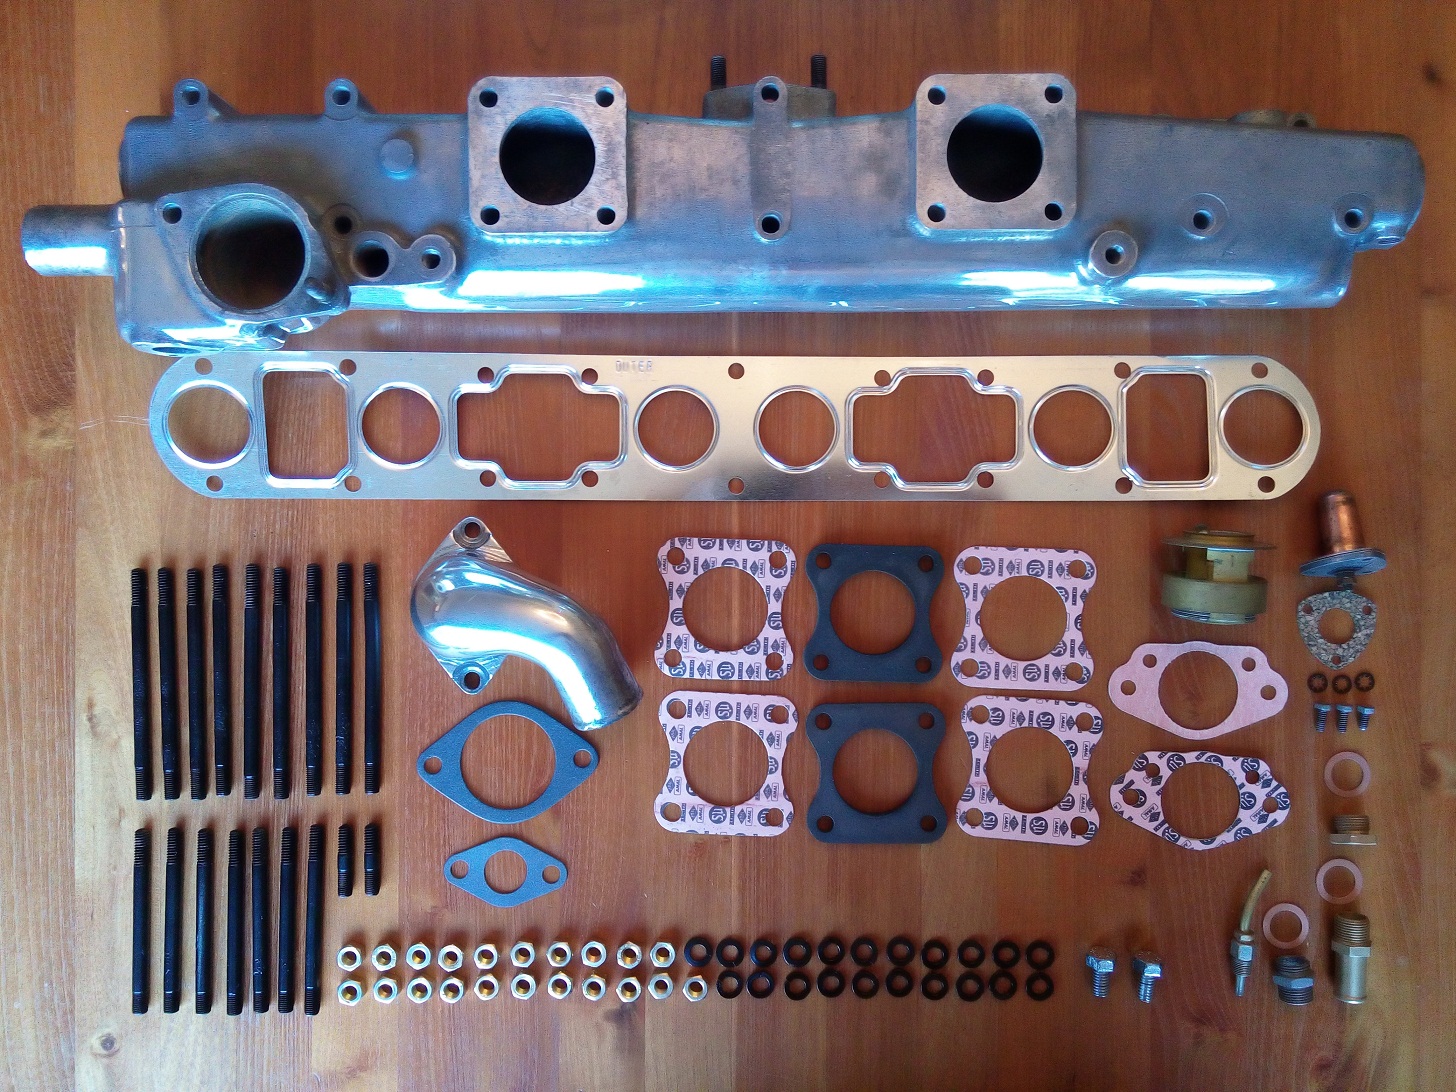
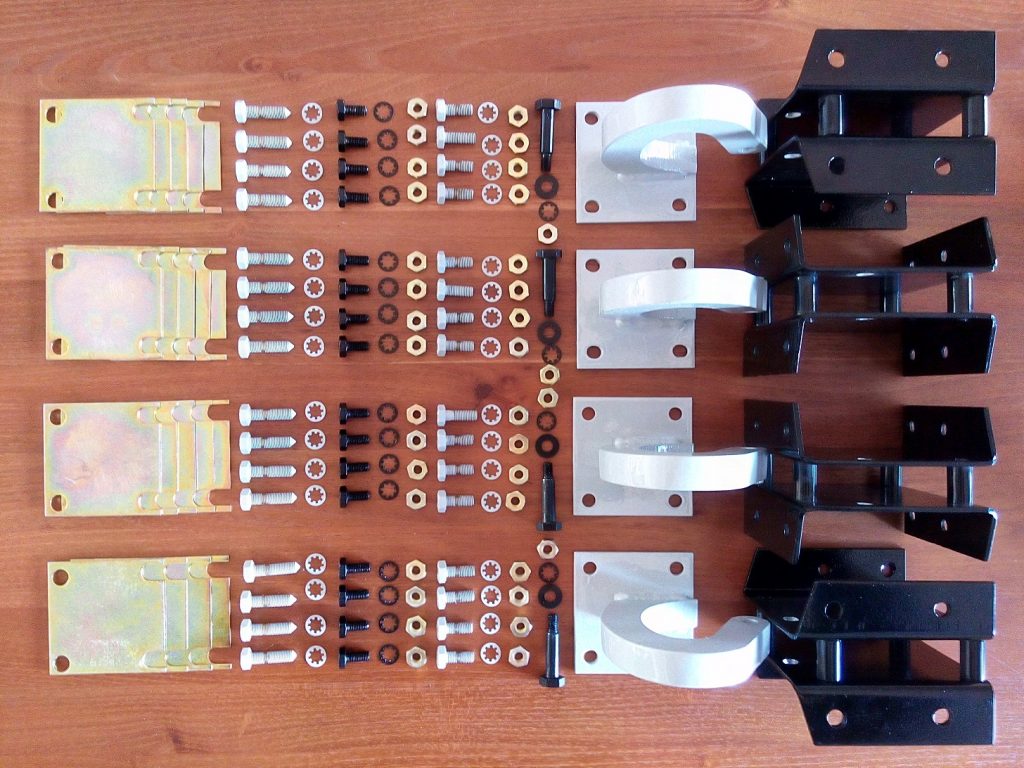
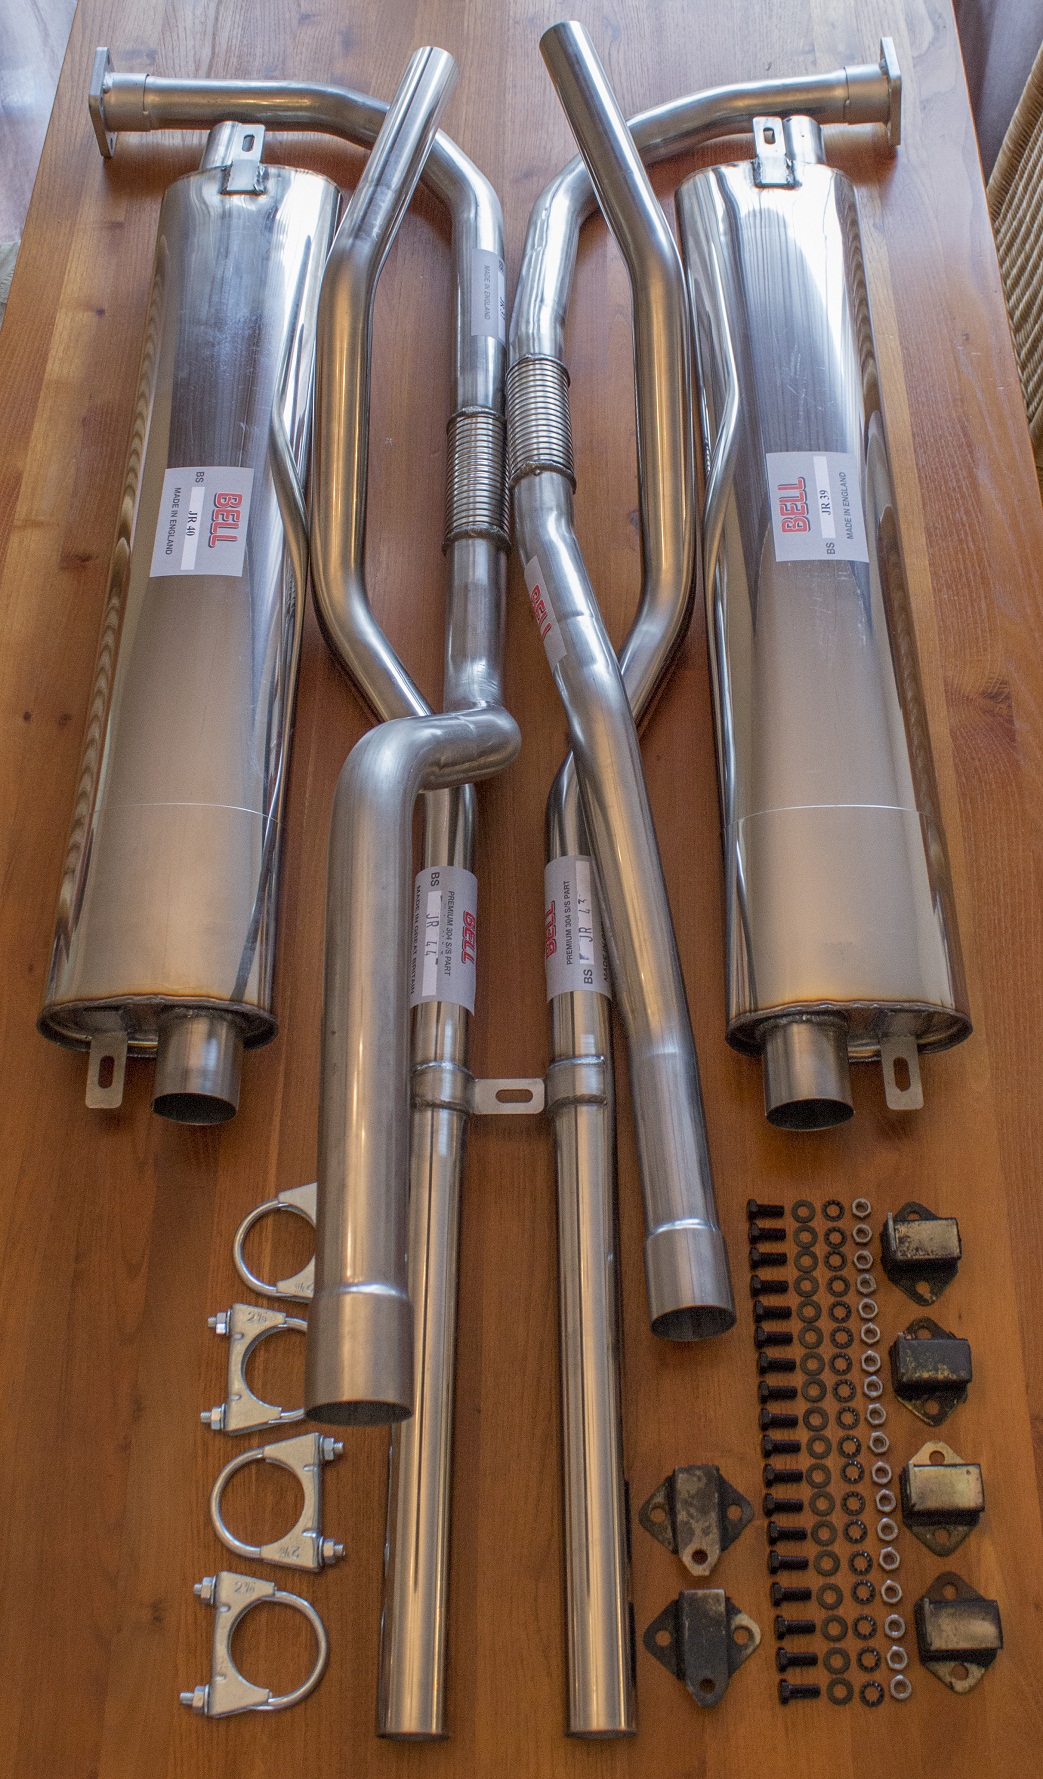
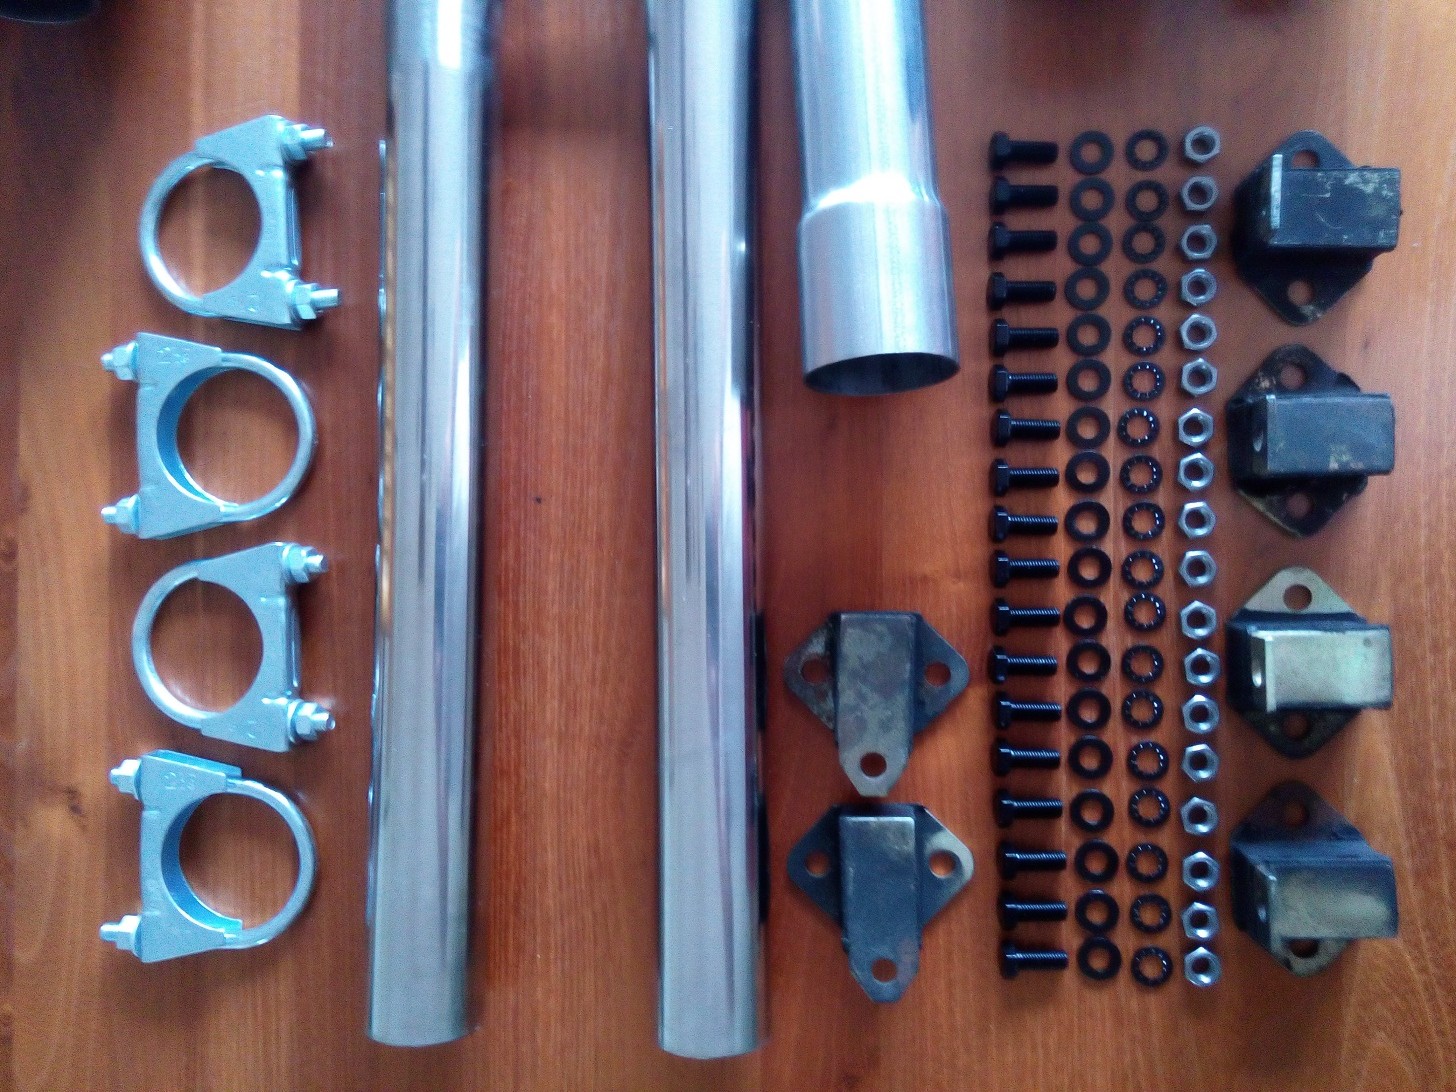
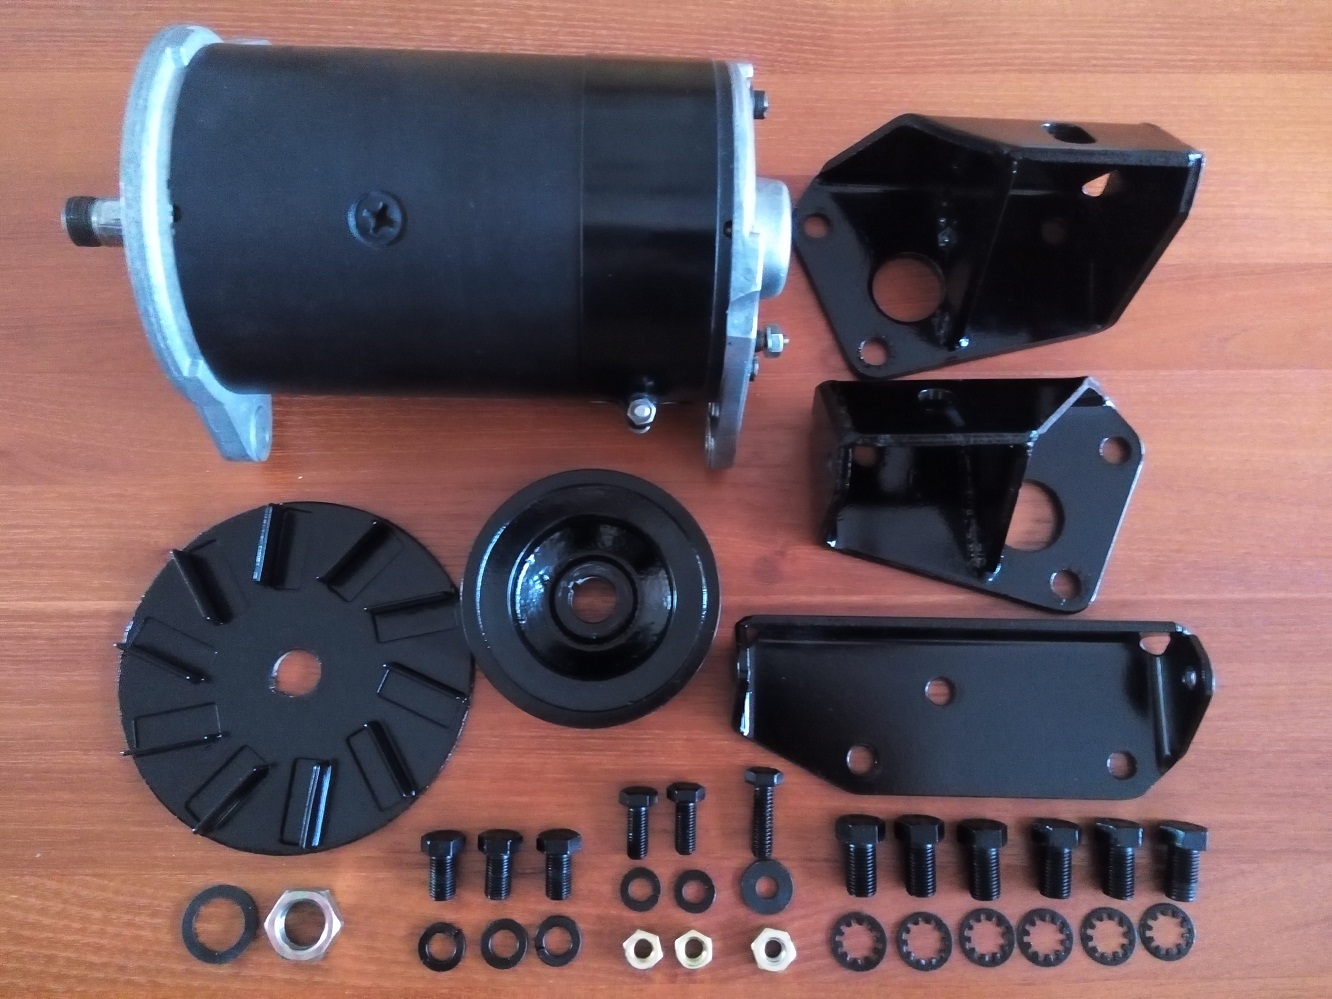
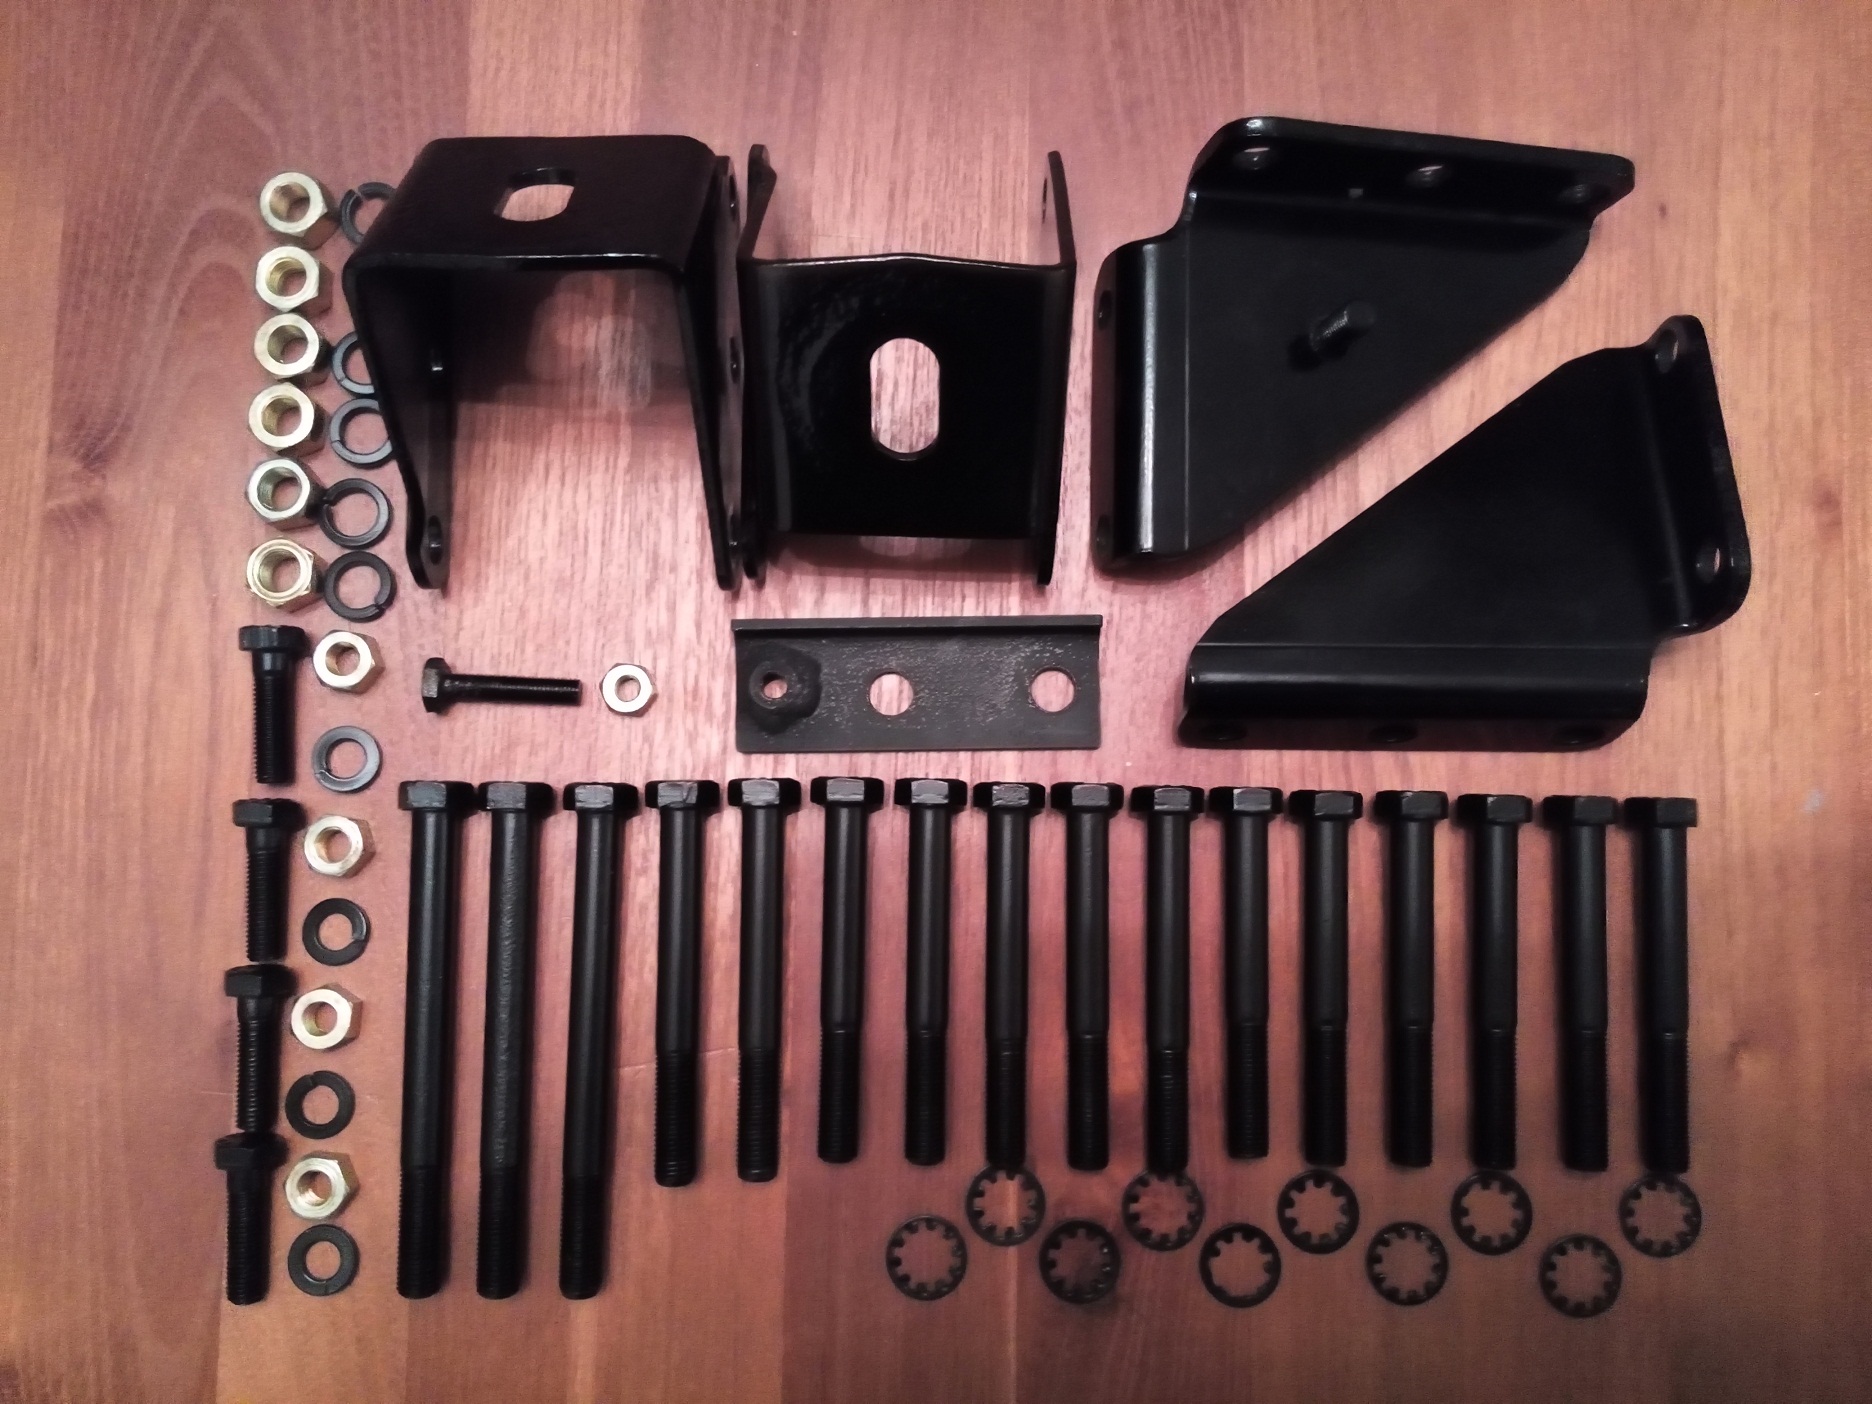
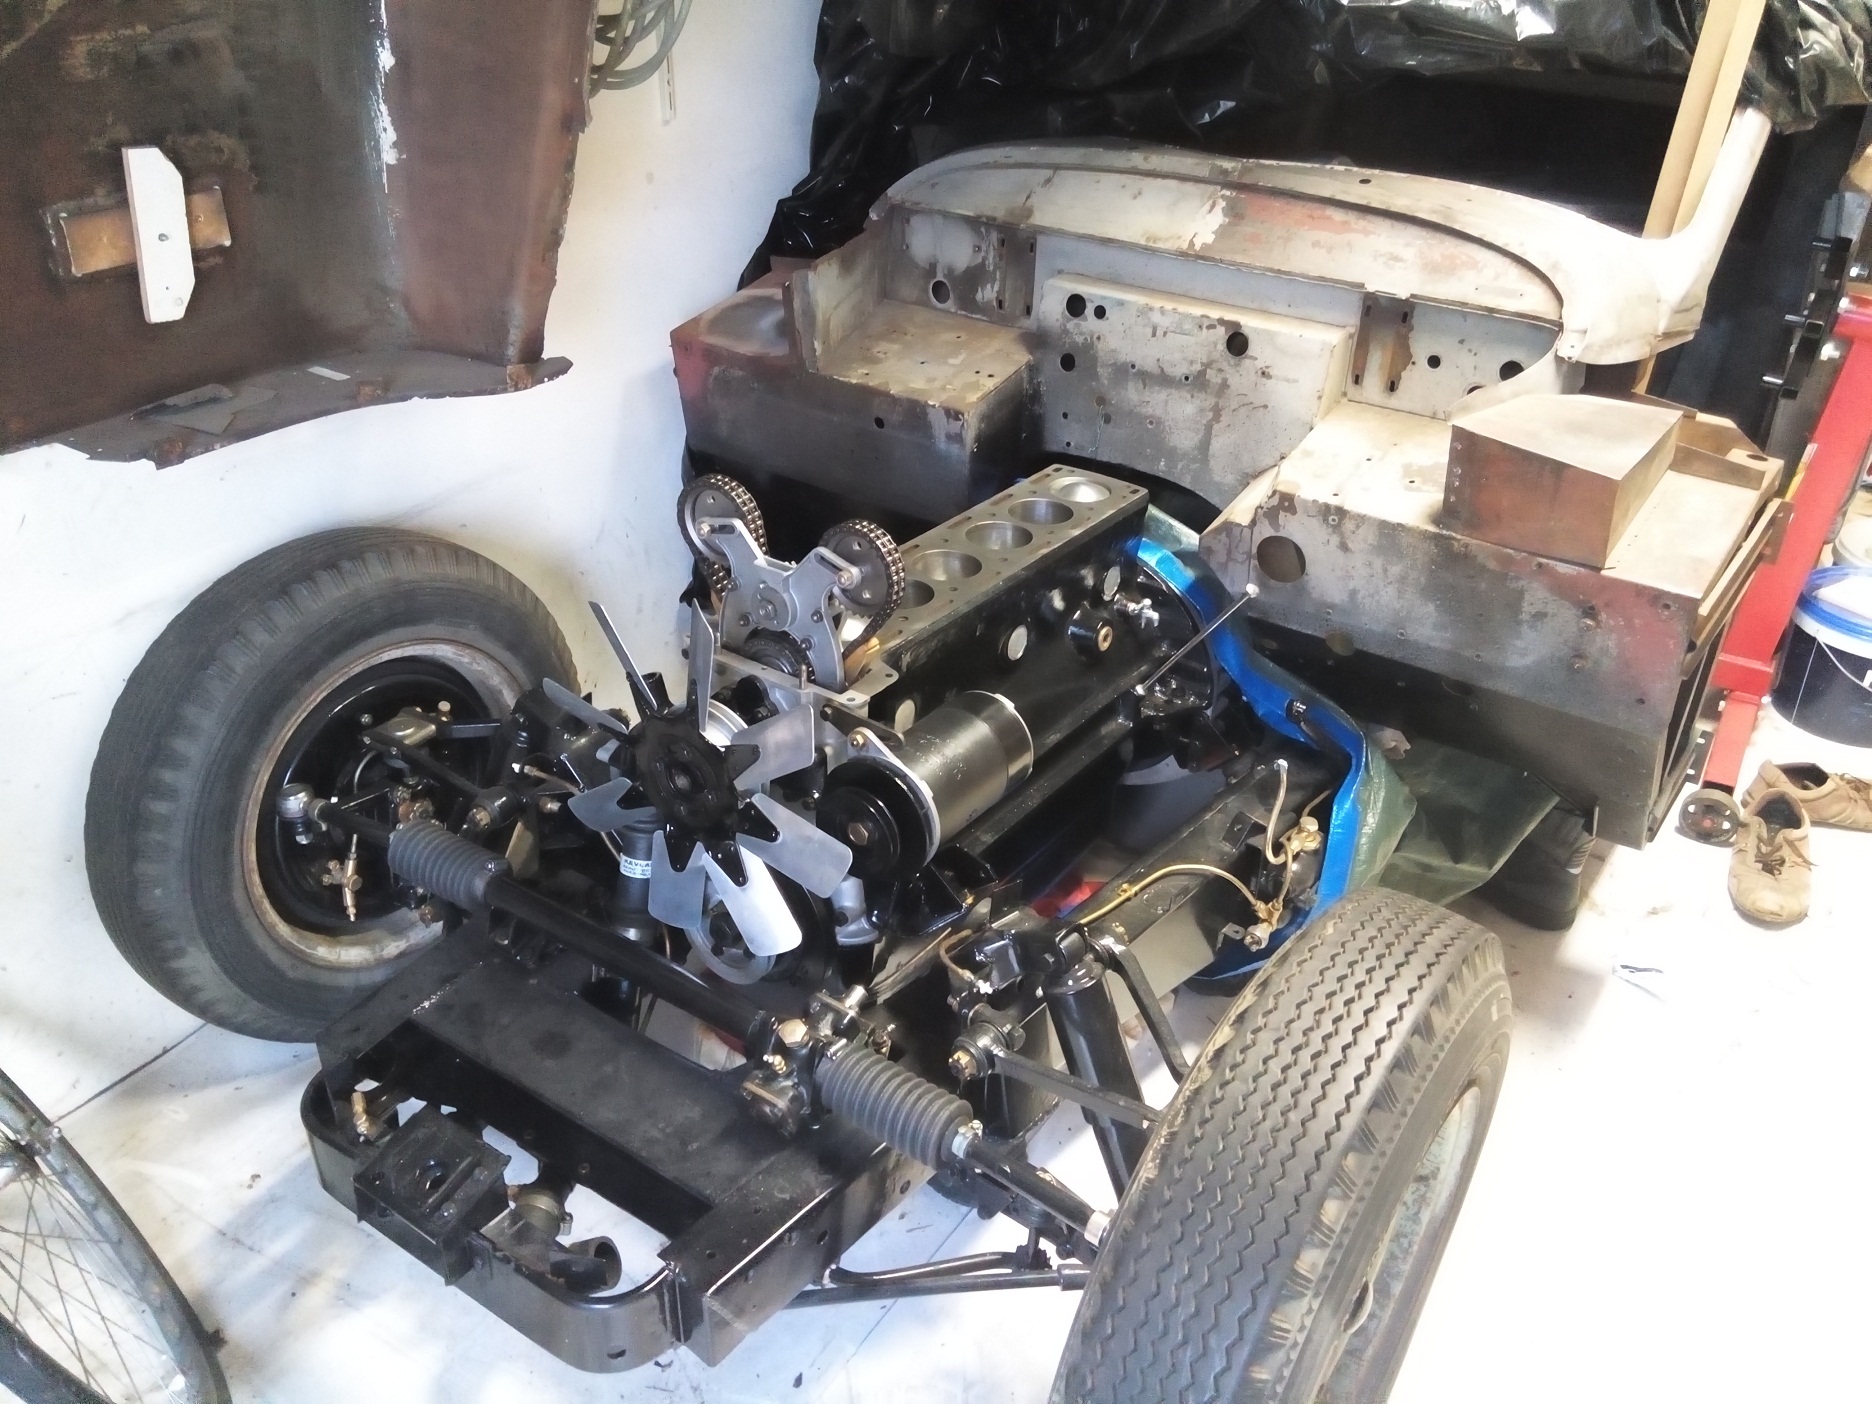
All parts needed to rebuild the fan blade installation

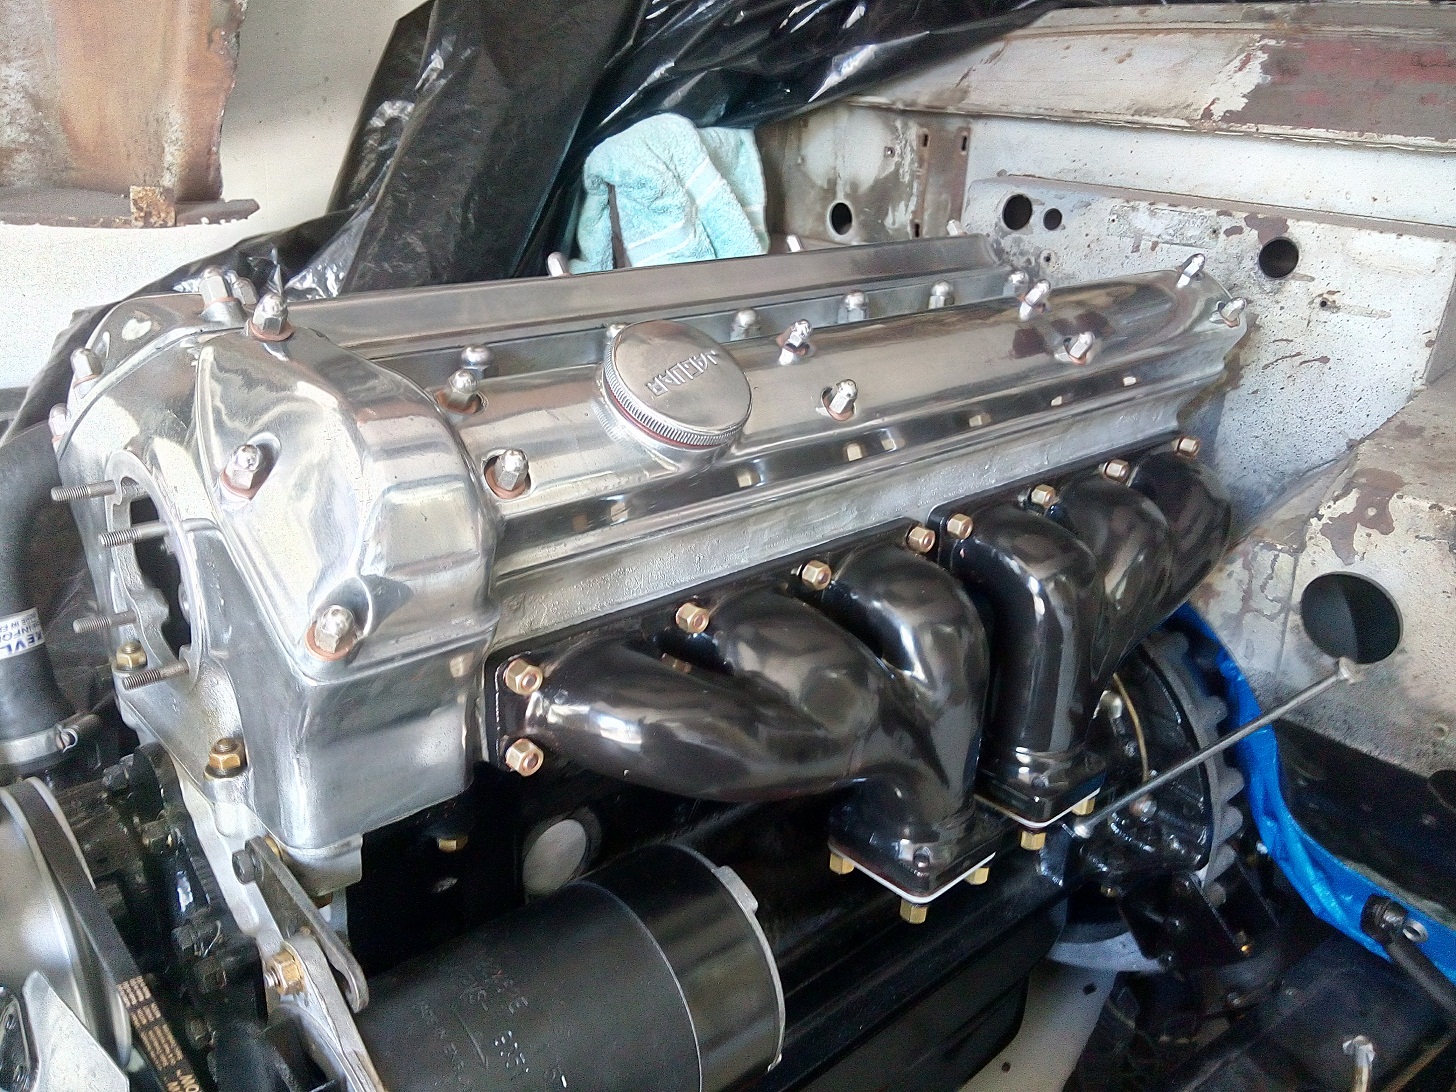
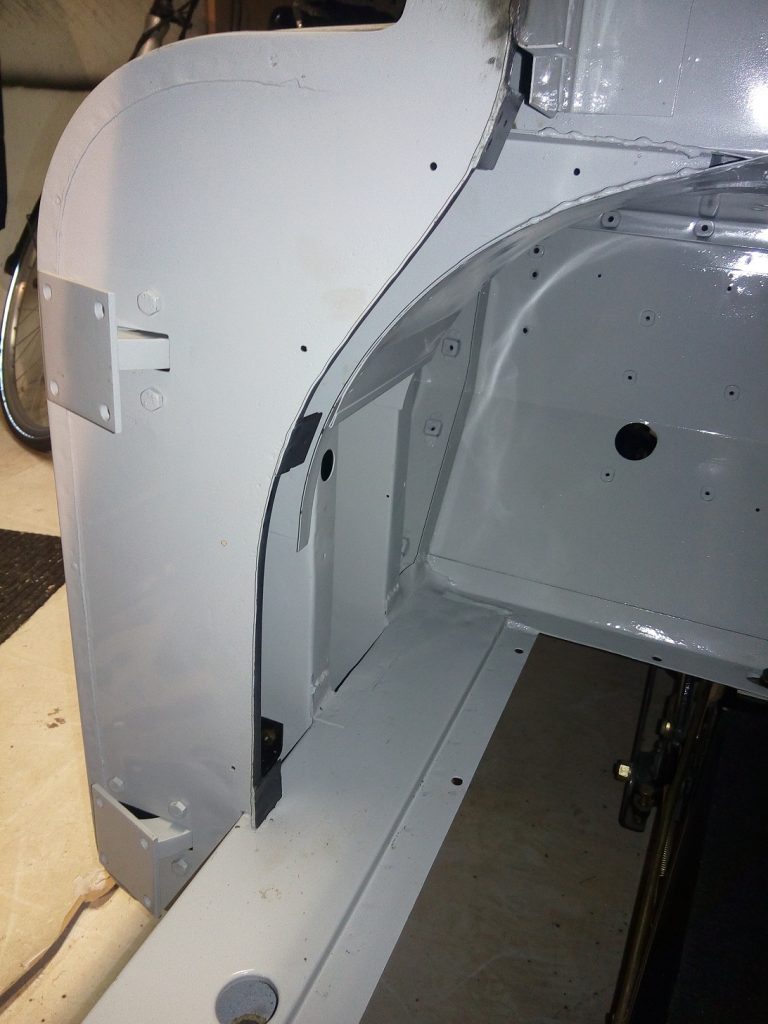
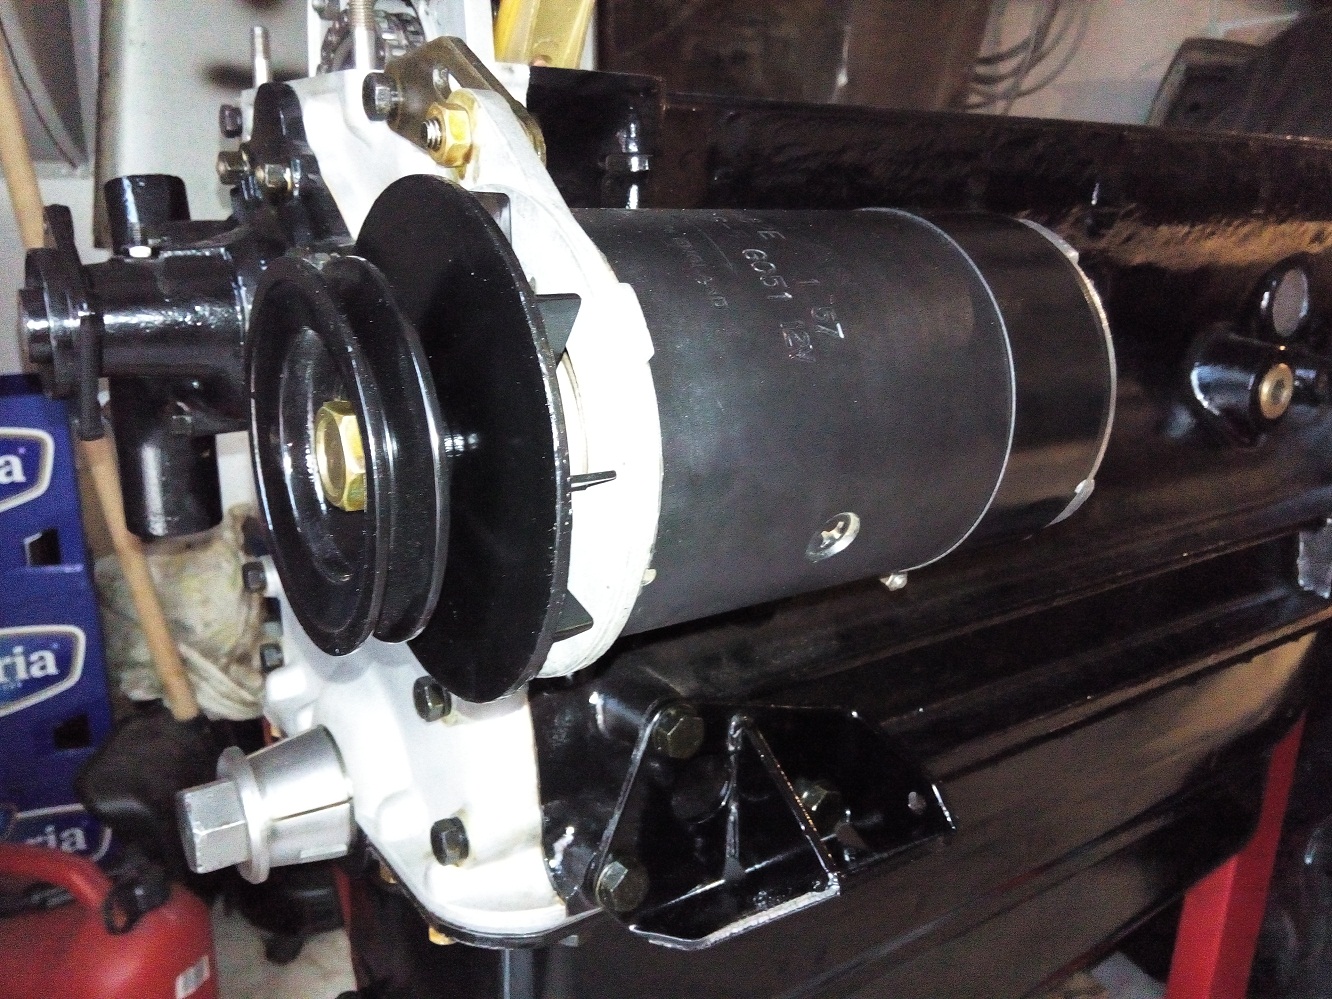
With the fan blade mounted the front of the engine is now almost finished. Only the cylinder head is missing, which is still at the machinery.

It is not completely clear if the aluminium blades should be painted black or not, the documentation is not very consistent. Most original pictures/photos show the bare aluminium without any paint.

CoolingFanMounted

 Posted by at 12:54
feb 222015
 

Before assembly of the engine could start all bearings are measured:

  • Mains bearings (6/100, still within specification)
    To prevent honing the crankshaft(I can only be done twice, and it will get less riged) I accept the play as it is.
  • Thrust washers (with one STD and one oversize 11/100)
  • Big-end bearings (4/100, still within specification)
  • Small-end bearing (No notable play)
CrankshaftDirty

Original uncleaned bottom view of the crankshaft

All separate parts are thoroughly cleaned and the following parts are bought new:

  • New main bearings (STD)
  • New big-end bearings (STD)
  • New thrust washers (STD + oversize)
  • New piston set (complete with 4 rings, gudgeon pin and circlips)
Crank Shaft parts

All cleaned and new parts needed to mount the crank shaft and pistons

Remarks:

  • Don’t forget the oil sealing ring at the rear block before the crankshaft is mounted.
  • Mount the bearing so the indicators will match (they are all numbered and the engine block also has these numbers stamped into the casting) Numbers should be kept at the inlet side.
  • The pistons are number from 1 until 6 starting from the backside of the block
  • The piston numbers are stamped into the connection rod and the big-end bearing cap
  • The piston numbers should be readable from the exhaust side
  • The compression piston rings should be mounted in opposite direction 0 and 180 degrees. I also mounted the oil scrapper rings at 90 and 270 degrees.
  • When piston 1 and 6 are in the TDC position the distributor shaft Distributor Shaft Positionshould be positioned at 5 to 5. The distributor shaft will make a half rotation when the crankshaft has made one.
  • When the timing chain is connected to camshaft make sure the distributor shaft is positioned as shown on the picture.
    (Remark the notch is positioned left from the middle at 5 to 5)

Because I found some pictures, original made in jaguar factory with painted text, I painted the “Jaguar” logo and the text “3 1/2 litre” in white.
Bellow the engine block with the pistons and crankshaft completely mounted.

hdr

Engine with the crankshaft and pistons installed

CrankShaftFinished

Crankshaft, bearing caps and connecting rods installed 

 Posted by at 17:42
apr 142016
 

Because not all parts needed for the cylinder head, inclusive the inlet – exhaust manifolds fit into one photo, I made three photo’s.

CylinderHeadParts

All parts needed to finish and mount the cylinder head on the engine

ExhaustManifoldParts

All parts needed to mount the exhaust manifolds

InletManifoldParts

All parts needed to mount the inlet manifold

All parts needed to rebuild the breather housing

Now that the cylinder head and exhaust manifolds are mounted it already begin to look at a complete Jaguar XK engine. The exhaust manifolds are bought via ebay in the USA for only $50 (inclusive national shipping ) A friend of the neighbors was kindly enough to take them for me to the Netherlands. Because the enamel still looks like new so I assume that the previous owner has redone this in the past.

CylinderHeadMounted

Cylinder head and exhaust manifold mounted

EngineFinishedRight

Cylinder head and inlet manifold mounted

 Posted by at 18:20
mrt 122009
 

Beside the shutface pilar, this area is often rusted badly. However my car was not rusted these places also need extra attention. Not very strange these places rust away because all water and dirt are kept together inside lower part of the dash side strengthener. Maybe we have to drill one or more big holes in the bottom to prevent that water and dirt will stay there.

First I removed all material below the 70% (original material left) and then remade all missing parts. Sprayed again everything in zinc paint and welded everything back to there original positions.

Left Side                                                            Right Side
DashsideStrengthenerLeftBeforeDashsideStrengthenerRightBeforeDashsideStrengthenerLeftRemovedDashsideStrengthenerRightRemovedDashsideStrengthenerLeftAfterDashsideStrengthenerRightAfter

 Posted by at 20:51
jan 132015
 

During the restoration process I found several times parts which looks different from what is described in the literature. (see Jaguar Books)

So far I found the following differences:

Doors

Most of the jaguar XK140 have doors that are made from aluminium steel and wood. The cars who are made in the last two production years can also be equipped with full steel doors. One of the most striking differences is the absence of the diagonal pull rod.

Wheel Spats

The spats which where mounted on my car have some extra horizontal reinforcement strip. Until today I have never found any pictures of this type of wheel spats.

Front seats

Normally the XK140 seat frames are made from a L shaped profile which is used for the outside floor frame. The backrest hinge is connected to this L shaped profile. The backrest is connected to the hinge via a steel plate.

seat frames

Raised seat frame on a 1956 XK140 FHC

My car has a raised edge on the backside of the floor frame. also the backrest hinge has been moved to the raised part (see photo). The backrest is connected to the hinge via metal tubes.

The construction looks identical to the one used on XK150 models with one exception they are smaller. Inside the XK150 was, due to thinner doors, more room for seats inside the interior.

 Posted by at 20:53
jan 012008
 

Do’s

  1. Make a lot of pictures from the disassembling and assembling process.
  2. Only buy bearings from the original brand (e.g. Timken)
  3. Buy all rubber parts from a good quality (e.g. Metalastik)
  4. Keep the body mounted onto the chassis during welding activities on the body to prevent warping or twisting of the structure
  5. Keep track of all spacers placed between chassis and body and make sure they are placed back on the same location.
    The spacers all look the same but they are all customized for the specific location.
  6. Make identification marks before removing the bearing caps from crankshaft and camshafts.
    It is a very expensive job to fix this afterwards.
  7. For replacing parts I use the 70% rule;
  8. a)  if the basis material is less then 70% replace with new sheet metal (complete or partly)
    b) If the basis material is better then 70% repair and keep the original sheet metal


Dont’s

  1. Be careful with dissembling the pinion and crown gears from differential casing.
    This job can only be done by specialists, and is not always needed.
  2. Be careful with removing the hubs from the rear axle. Don’t use pulling devices which attaches on the outside of the hubs, it better to use one connected to the wheel mounting studs.
 Posted by at 12:00
okt 222017
 

Before the front wings can be mounted finally the door hinges must be placed. These hinges are the connection between the front wings and the dashboard strengthener.

Parts needed for the left and right door hinges

 Posted by at 19:27
jun 122016
 

The original exhaust which came with the car was completely rusted away and should be replaced. Originally the car was equipped with a single exhaust but I think a dual exhaust looks much better. With respect to originality this should’t be problem because it is a replacement part. (A single exhaust can be mounted in the future is needed)

The new dual exhaust from Bell (BSS-JR-003, XK140/XK150 LHD manual) consists of:

  • BSJR37 Front pipe left
  • BSJR38 Front pipe right
  • BSJR39 Silencer left
  • BSJR40 Silencer right
  • BSJR43P Tail Pipe left
  • BSJR44P Tail Pipe right
DualExhaustPartsDetail

Nuts, Bolts and Clamps

The clamps, needed to fasten the exhaust pipes to each other have different diameters, 58mm for the front side of the silencer and 48 for the rear side.

ExhaustFinished

Dual exhaust mounted onto the manifold 

 Posted by at 17:49
mei 172015


DynamoOrigineel

Original dynamo removed from engine

Because the above dynamo, mounted to my engine, was originally from a XK120 I needed to look for the correct one.

This dynamo has a brass identification plate with the following information:
Lucas 22452B, GC51, C45PVS/5, 12V, 53

The dynamo I needed should have the following numbers:
Lucas ,22462B, GC51, C45PVS/5, 12V, 56

An other XK140 restorer in my neighborhood offered me a deal I couldn’t refused.
Exchange mine xk120 dynamo for a correct, fully restored, xk140 dynamo and give him a small reimbursement for the parts he used for the restoration.

DynamoParts

All parts needed for rebuilding the dynamo

All separate parts are again sandblasted and pained black so they all look again as new.
To prevent rust, and make it easier to remove them in the future, the bolts are also painted black and mounted with a little bit tectyle.

DynamoMounted

Dynamo and engine brackets mounted on the engine

 Posted by at 14:05
jan 102016
 

Because the engine (cylinder head is not yet mounted) and gearbox are now finished they can be bolted together and mounted onto the chassis.

BellhousingMountingParts

Parts needed to mount engine to gearbox and to the chasis

Without the front wings mounted it was very easy to place the engine, with the help of the engine lifter, back onto the chassis. The bell housing and gearbox, not clearly visible on the photo, is already mounted onto the engine.

EngineOnChassis

Motor, bell housing and gearbox mounted onto the chassis

EngineOnChassisRight

Right side motor mounting

EngineOnChassisLeft

Left side motor mounting

 Posted by at 19:42