jan 012008
 

The first idea to start with the restoration of a classic was born in 2002.
I was particular interested in cars from the post war period.
Some nice specimens are;
– Jaguar XK120 (1949-1954)
– Jaguar XK140 (1954-1957)
– Forst Mustang (1964-1967)
– Chevrolet C1 or C2 (1953-1967)
– Mercedes 190SL (1955-1963)
– BMW 507 (1956-1959)
– MGA (1955-1962)
– Triumph TR2 or Tr3 (1953-1957)
– Porsche 356 (1948-1965)

From 2002 on I started with searching the internet for one of the above types, within my budget 🙂
I have seen several very rotten ones so it was not an easy job.

A friend of mine bought his car from Jan Arets in Budel and decided to pay him a visit. I was lucky because that day he received two very nice Jaguar XK’s (XK120 FHC and a XK120 DHC). I asked him the price and was shocked by the asking price off about 19k euro. After struggling a couple of days about this in my eyes huge amount I decided to make the call, but the FHC was already sold and he was negotiating about the other XK(DHC). (so this was a dead end…)

In the upcoming time period I found a lot of cars from the above list on www.marktplaats.nl but never found a good restoration object. During the searching process my preference for the Jaguar XK kept increasing and decided to narrow my search criteria.

On 9 September 2008 I found a good restoration object on marktplaats from a guy called Cees van Ouwerkerk (car broker)
The only big dis-advance with this car, it was almost completely disassembled. After checking all photo material I decided to take the chance and bought the car.
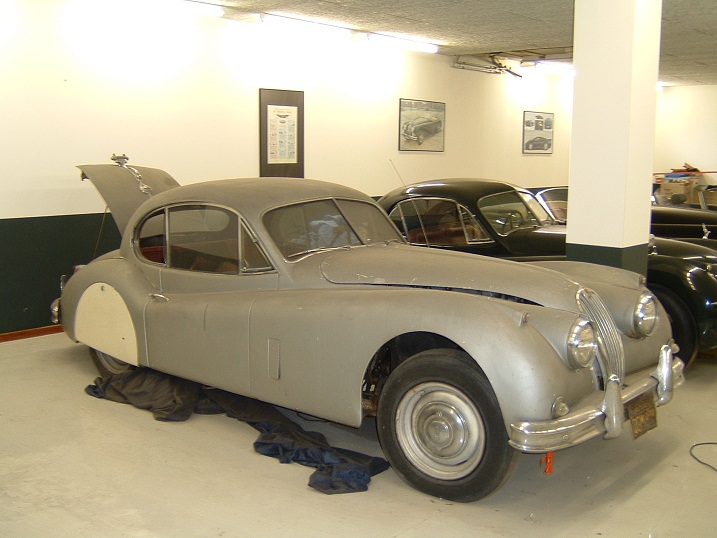
This is how the car looked before it was disassembled by the previous owner

This is how the car looked before it was disassembled by the previous owner

 Posted by at 12:00
jan 012008
 

Do’s

  1. Make a lot of pictures from the disassembling and assembling process.
  2. Only buy bearings from the original brand (e.g. Timken)
  3. Buy all rubber parts from a good quality (e.g. Metalastik)
  4. Keep the body mounted onto the chassis during welding activities on the body to prevent warping or twisting of the structure
  5. Keep track of all spacers placed between chassis and body and make sure they are placed back on the same location.
    The spacers all look the same but they are all customized for the specific location.
  6. Make identification marks before removing the bearing caps from crankshaft and camshafts.
    It is a very expensive job to fix this afterwards.
  7. For replacing parts I use the 70% rule;
  8. a)  if the basis material is less then 70% replace with new sheet metal (complete or partly)
    b) If the basis material is better then 70% repair and keep the original sheet metal


Dont’s

  1. Be careful with dissembling the pinion and crown gears from differential casing.
    This job can only be done by specialists, and is not always needed.
  2. Be careful with removing the hubs from the rear axle. Don’t use pulling devices which attaches on the outside of the hubs, it better to use one connected to the wheel mounting studs.
 Posted by at 12:00
jan 012008
 

1) Always buy a complete car, it is almost impossible to see if a car is complete from a pile of boxes. The parts which are missing are always very difficult to find and they can be very expensive.

2) If you are looking for a complete restoration object don’t buy one who is looking to nice. It will be to expensive at the end because your are going to replace everything after all. It is cheaper to buy one with a lot of work because the object selling price is will be much lower then a cosmetic good looking car.

3) …

 Posted by at 12:00